Managing Admin Access to the Aidbox UI Using Okta Groups
Objectives
- Configure integration with the Okta Identity Provider to enable secure login to the Aidbox UI
- Manage administrative access to the Aidbox UI through Okta by assigning users to specific groups
Before you begin
- Create an account in Okta development portal
- Make sure your Aidbox version is newer than 2107
- Setup the local Aidbox instance using getting started guide
Managing Admin Access to the Aidbox UI Using Okta Groups
Create a Client (Application) in Okta
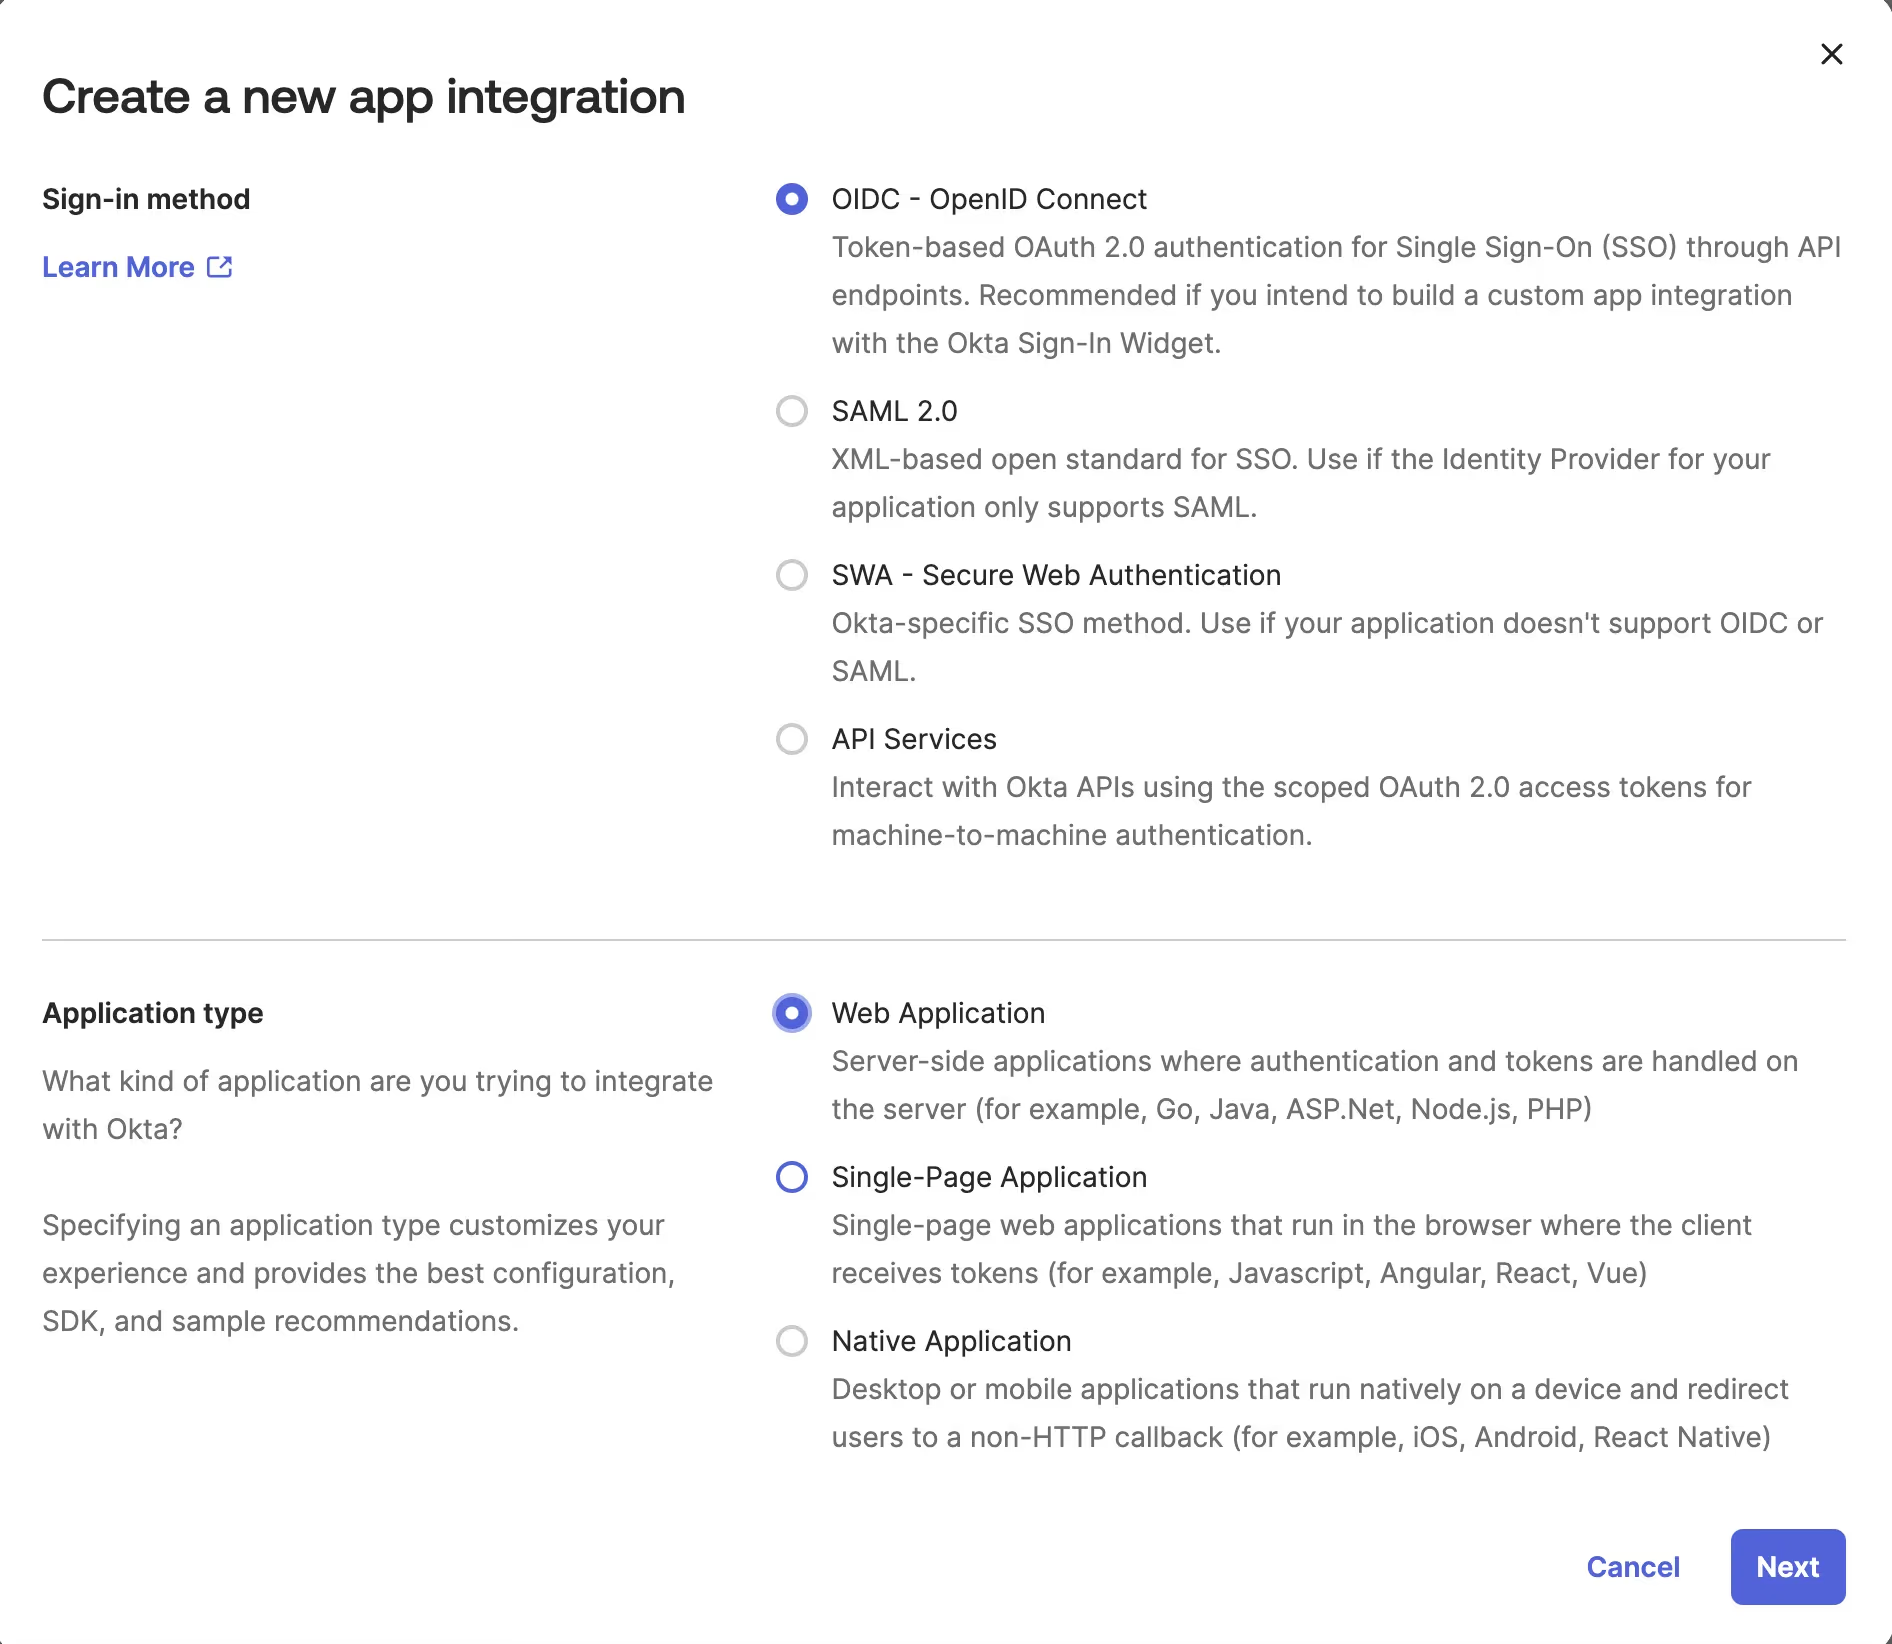
Go to Applications -> Applications in Okta portal and click "Create App Integration" button.
- Sign-in method: OIDC - OpenID Connect
- Application type: Web Application
Enter Application details:
- App integration name: Aidbox
- Grant type:
- Authorization Code
- Refresh Token
- Implicit (hybrid)

- Sign-in redirect URIs:
http://localhost:8080/auth/callback/okta-identity-provider - Controlled access: Skip group assignment for now

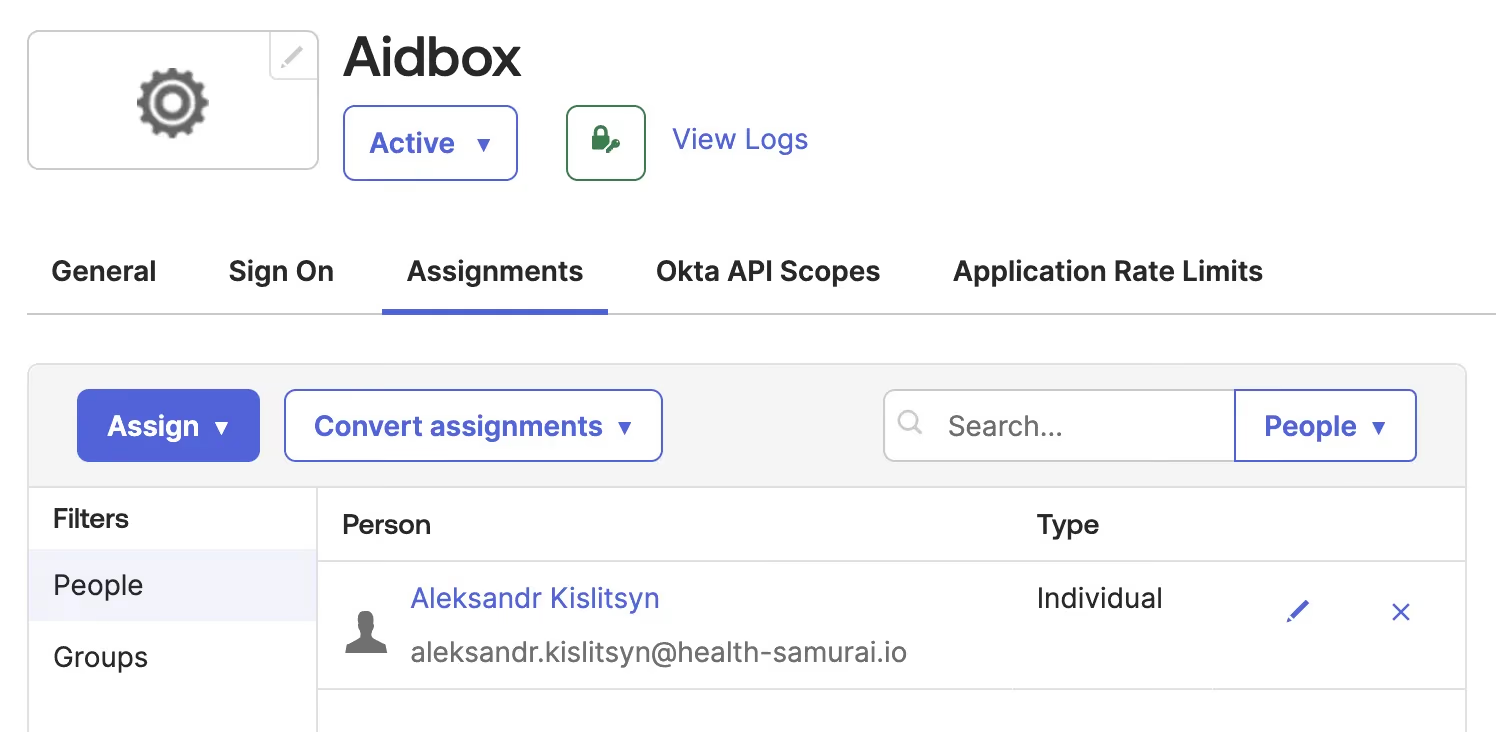
Assign the application to your personal account in Okta:
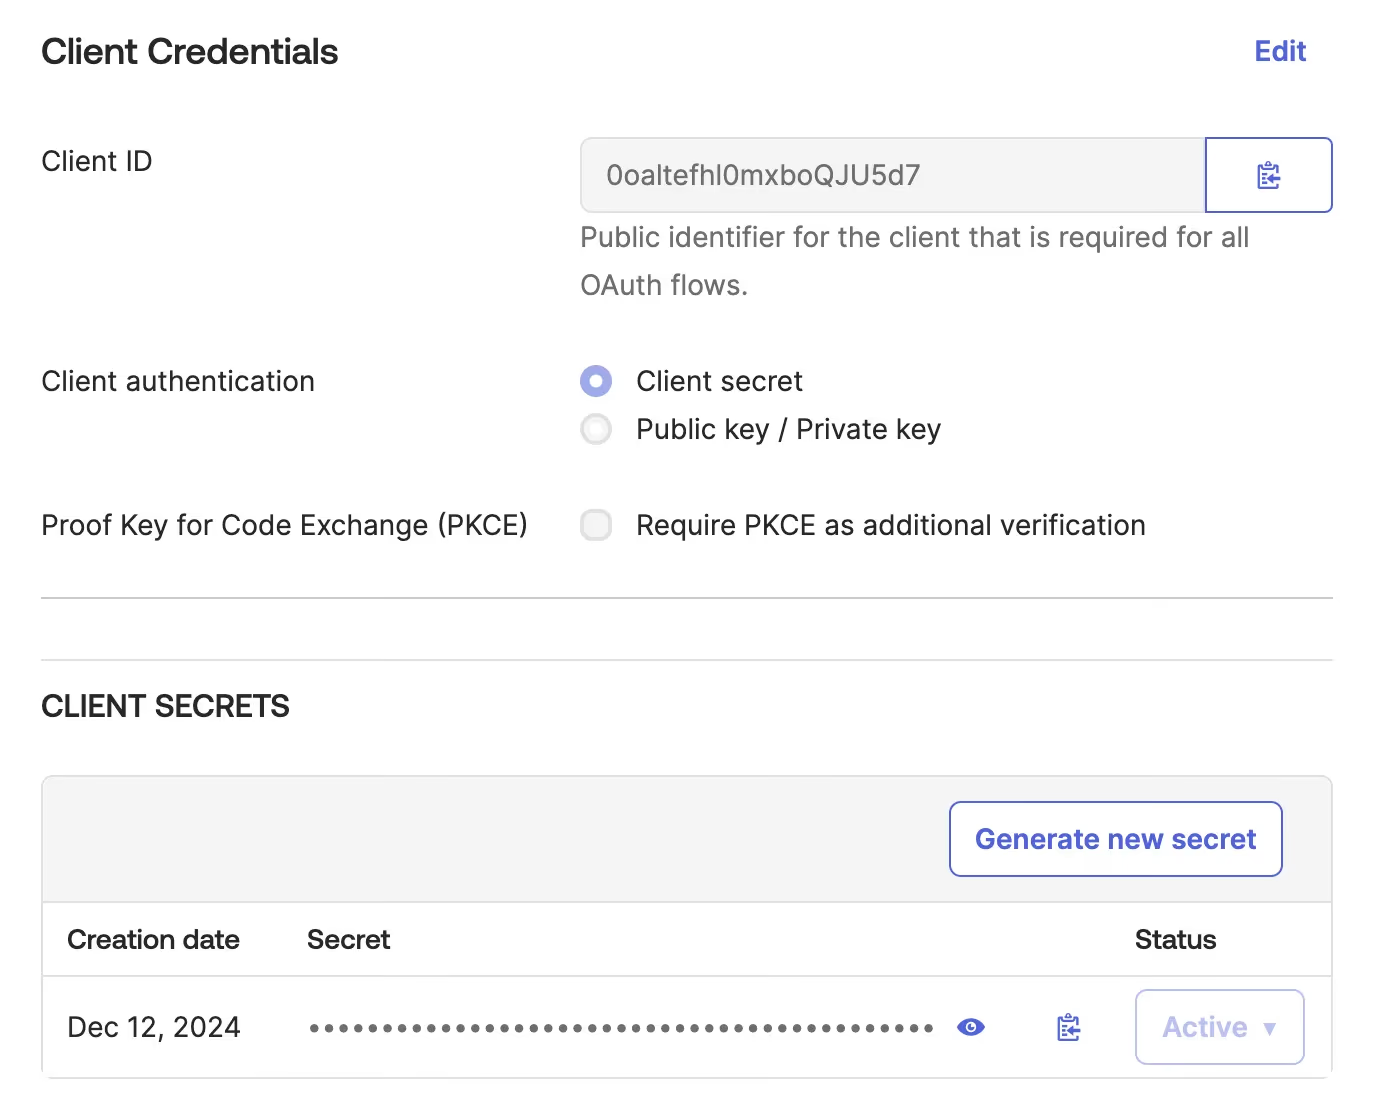
Checkout Client ID and Client secret:
Create an IdentityProvider in Aidbox
Login to Aidbox UI.
Use REST Console to execute the request below.
<okta-domain>should be your Okta domain, e.g.dev-43727041.okta.com- replace
<client-id>and<client-secret>with the actual values
PUT /fhir/IdentityProvider/okta-identity-provider
content-type: application/json
accept: application/json

{
 "scopes": [
  "profile",
  "openid"
 ],
 "system": "okta",
 "authorize_endpoint": "https://<okta-domain>/oauth2/default/v1/authorize",
 "token_endpoint": "https://<okta-domain>/oauth2/default/v1/token",
 "userinfo-source": "id-token",
 "client": {
  "id": "<client-id>",
  "secret": "<client-secret>",
  "redirect_uri": "http://localhost:8080/auth/callback/okta-identity-provider"
 },
 "type": "okta",
 "resourceType": "IdentityProvider",
 "title": "MyOkta",
 "active": true
}
Login into Aidbox using Okta user
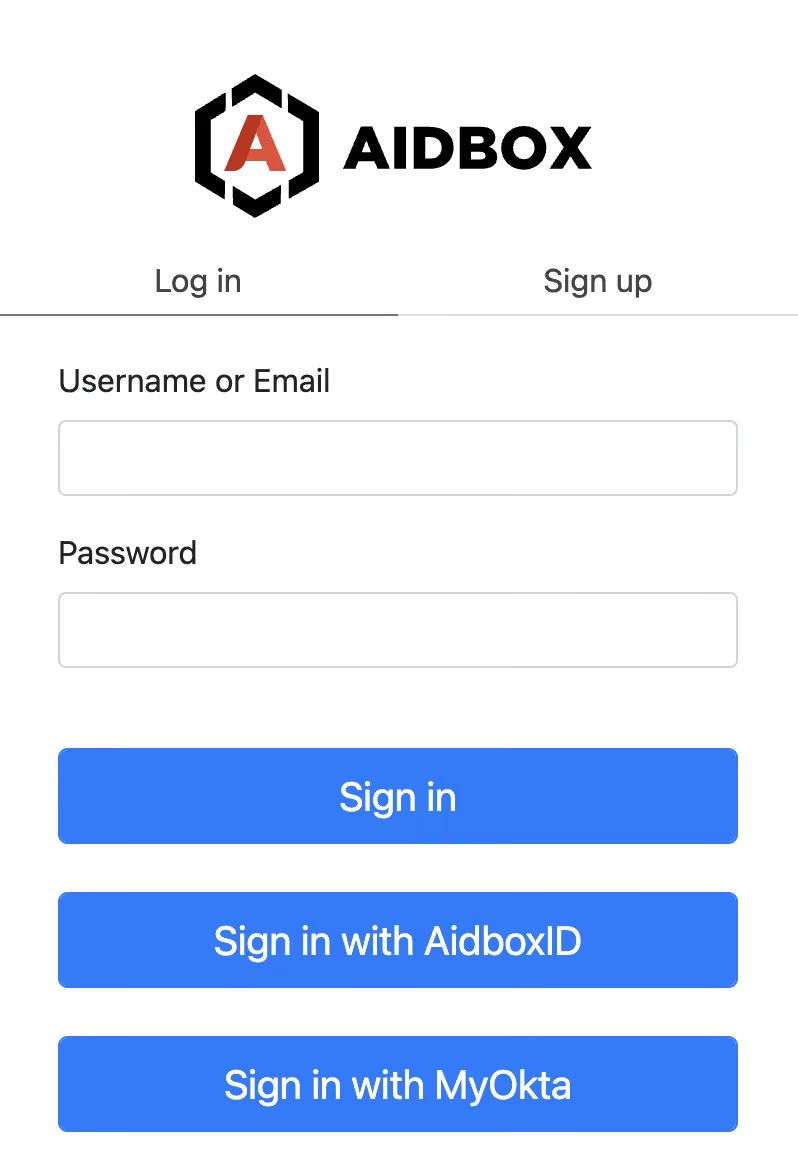
Go to the Aidbox login page. You should see Sign in with MyOkta button.
Press this button and log in with Okta user into Aidbox.
You should not be able to see much in the Aidbox because there's no access policy for your user yet.
Relogin with admin and check the user created in Aidbox for your Okta user. Go to IAM -> User and click on the user ID.
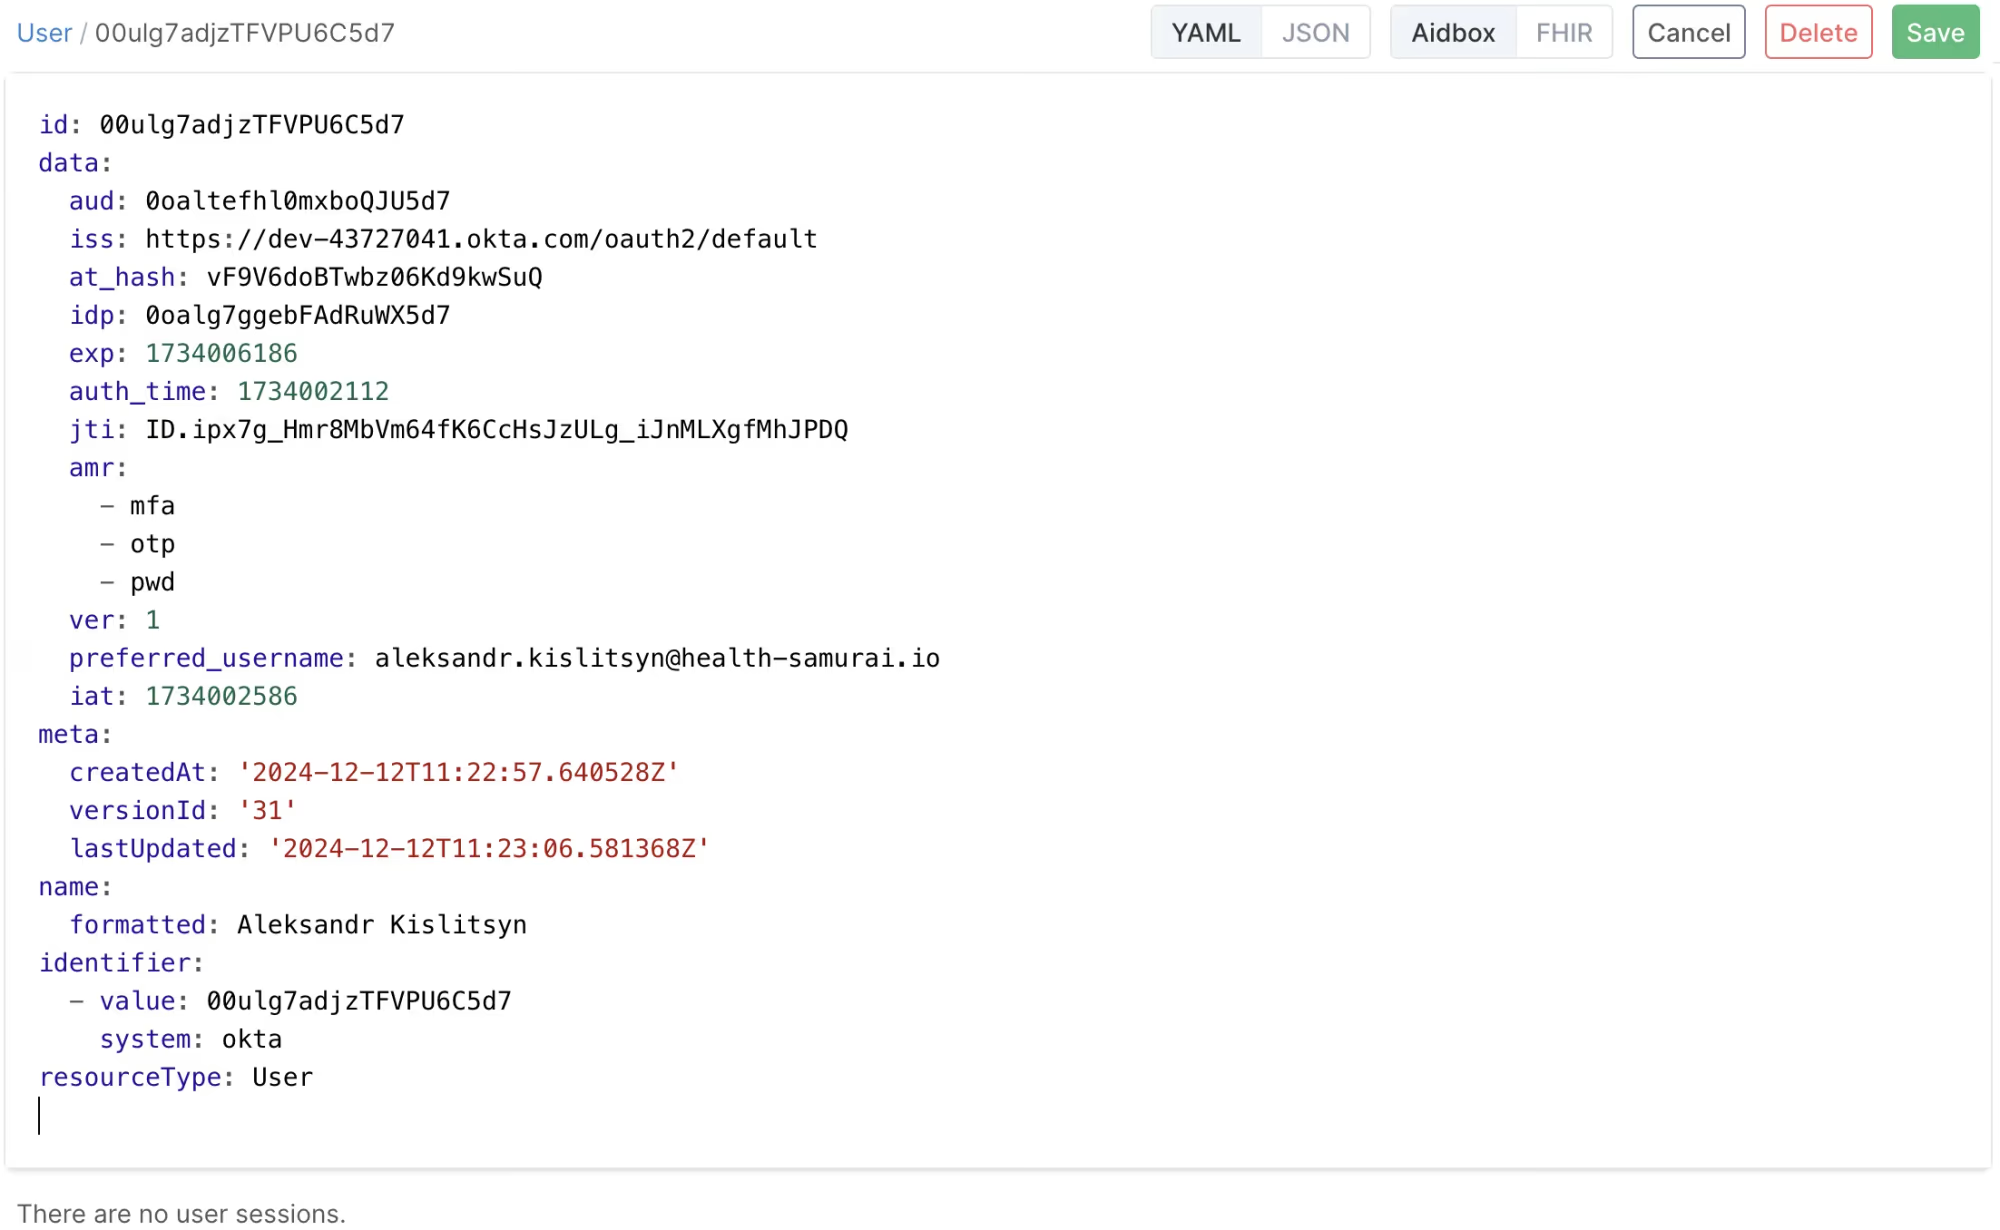
User Resource is Aidbox is updated every time the user logs in using external Identity Provider. Source of the user information is configured using userinfo-source element in IdentityProvider configuration resource.
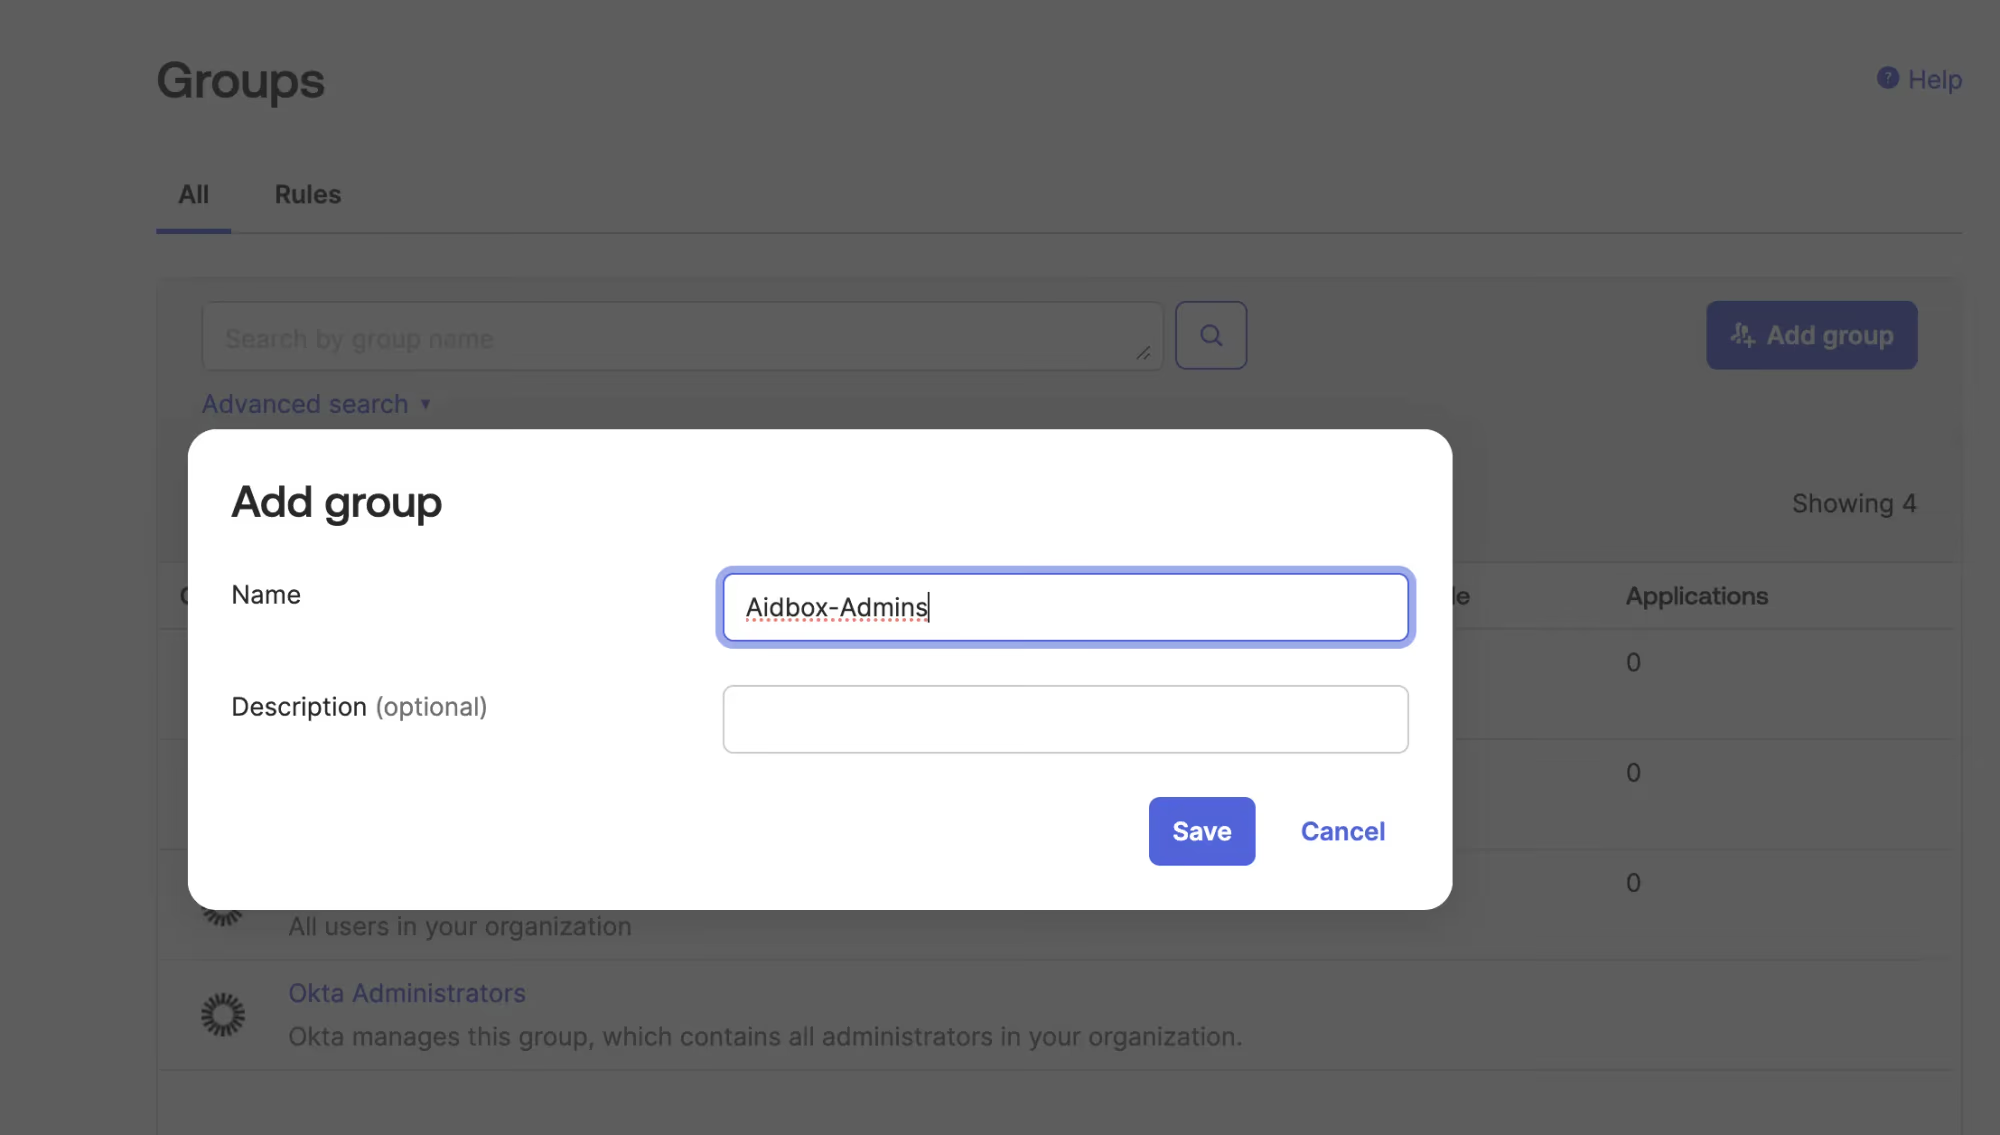
Create the Aidbox-Admins group in Okta
In Okta go to Directory -> Groups and create group Aidbox-Admins
Add your user to the group

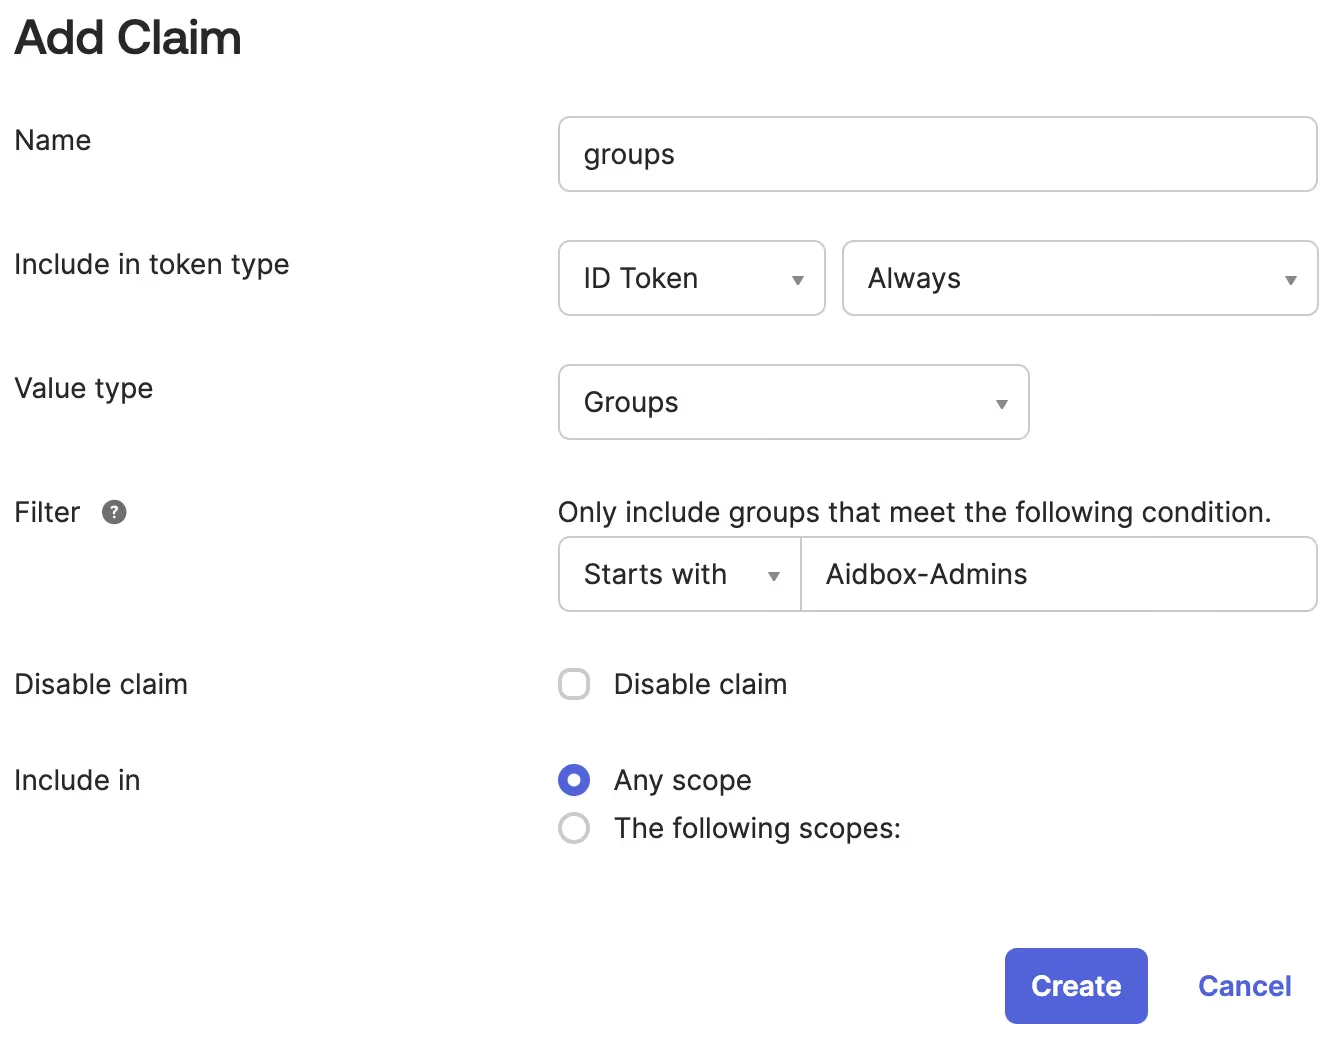
Customize ID token in Okta to include groups
In Okta go to Security -> API drill down to the default authorization server go to Claims tab. Click Add Claim button.
- name: groups
- Include in token type: ID Token
- Value type: Groups
- Filter: Starts with: Aidbox-Admins
- Include in: any scope
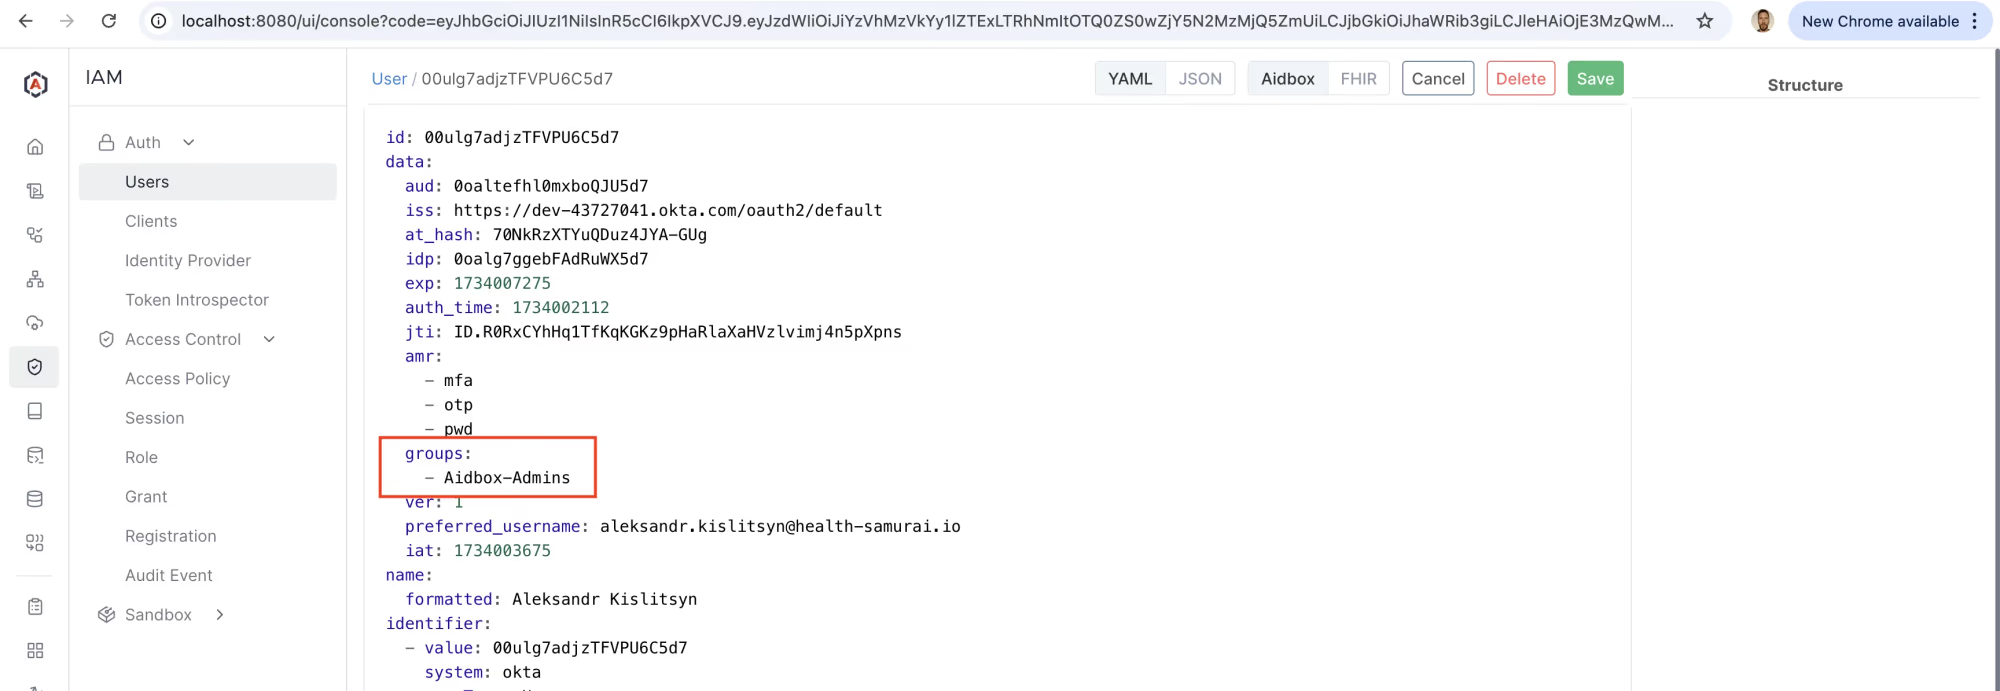
Make sure the group info from Okta is making into Aidbox
Relogin into Aidbox using Sign in with MyOkta button. The user is updated with Okta groups data. Relogin with admin and check.
Create the AccessPolicy
Use REST Console to execute the request
PUT /fhir/AccessPolicy/okta-admins-policy
content-type: application/json
accept: application/json

{
 "engine": "matcho",
 "matcho": {
  "user": {
   "data": {
    "groups": {
     "$contains": "Aidbox-Admins"
    }
   }
  },
  "request-method": {
   "$enum": [
    "get",
    "post",
    "put",
    "delete"
   ]
  }
 },
 "resourceType": "AccessPolicy"
}
Now you can relogin with your Okta user and the user will be granted admin access.
What's next
- See more about Aidbox Security security-and-access-control