


How to Set Up an MCP FHIR Server
1. Launch a New Aidbox Instance
Start by running the following command in your terminal:
curl -JO https://aidbox.app/runme/mcp && docker compose up
This command will download the Docker Compose configuration file for the new Aidbox instance with the MCP server enabled and then launch the services.
2. Activate your Aidbox instance
Open your browser and go to [http://localhost:8080](http://localhost:8080) to activate your Aidbox instance:
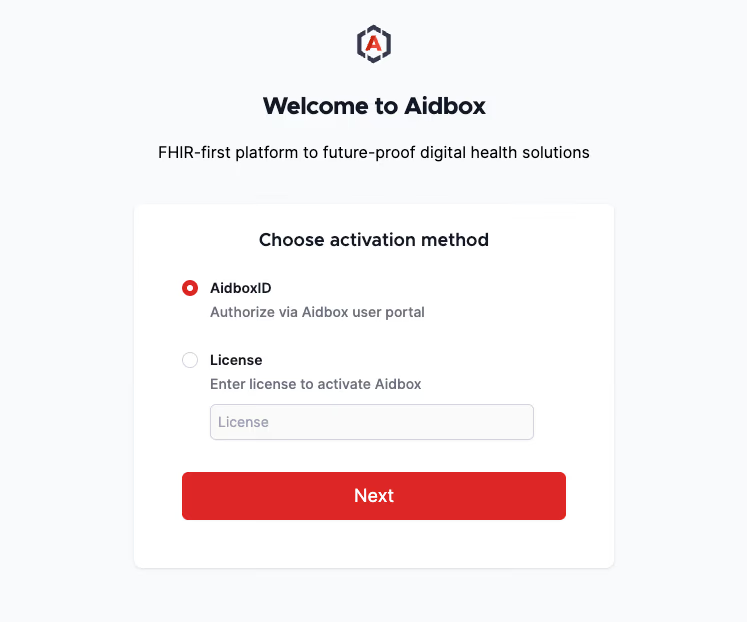 Issuing a development license is free – just register in the Aidbox user portal and create a new development license.
3. Connect Your LLM Desktop Application to Use Aidbox MCP Server
To use Aidbox's MCP Server with your local LLM desktop application – such as Claude Desktop – follow the steps below:
Prerequisites
Before getting started, make sure you have:
- Node.js v18 or higher installed.
- Uninstalled all Node.js versions below v18, as Claude Desktop may not function correctly with older versions.
Configuration Steps for Claude Desktop
- Open Settings → Developer → Edit Config
- Update the claude_desktop_config.json file with the following snippet:
{
  "mcpServers": {
    "aidbox": {
      "command": "npx",
      "args": [
        "-y",
        "@latitude-data/supergateway",
        "--sse",
        "http://localhost:8080/sse"
      ]
    }
  }
}
For detailed information about Aidbox's MCP server and how to configure different LLM applications, please visit: https://www.health-samurai.io/docs/aidbox/modules/other-modules/mcp
Let's See It in Action
Once everything is configured, you’re ready to interact with your FHIR server using Claude Desktop powered by the MCP protocol.
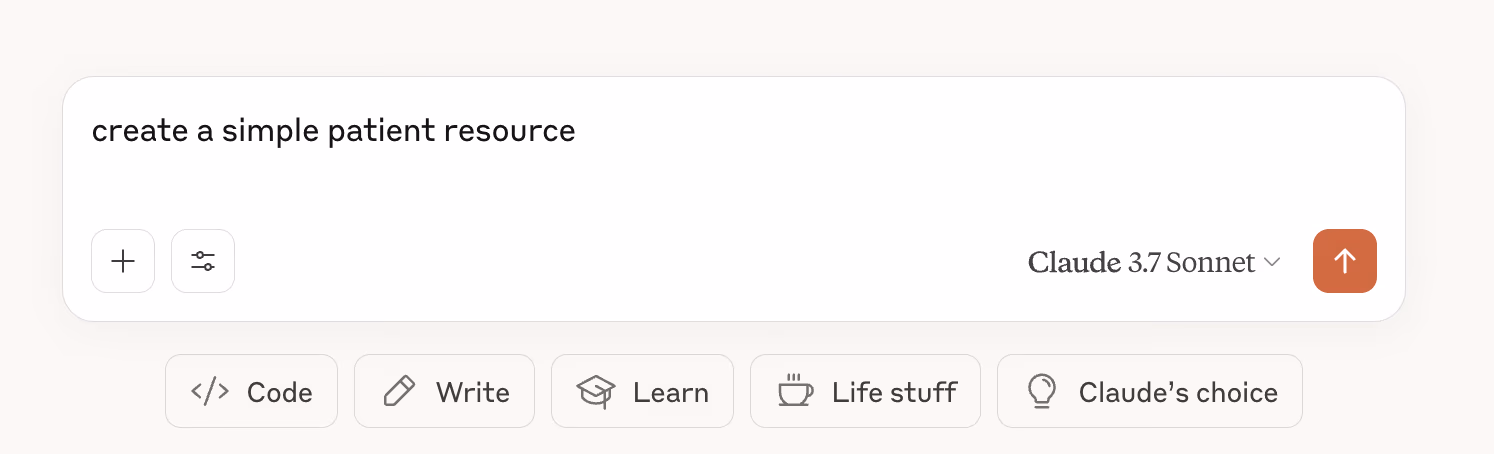
Creating a Basic Patient Resource
We’ll start by creating a basic Patient resource:
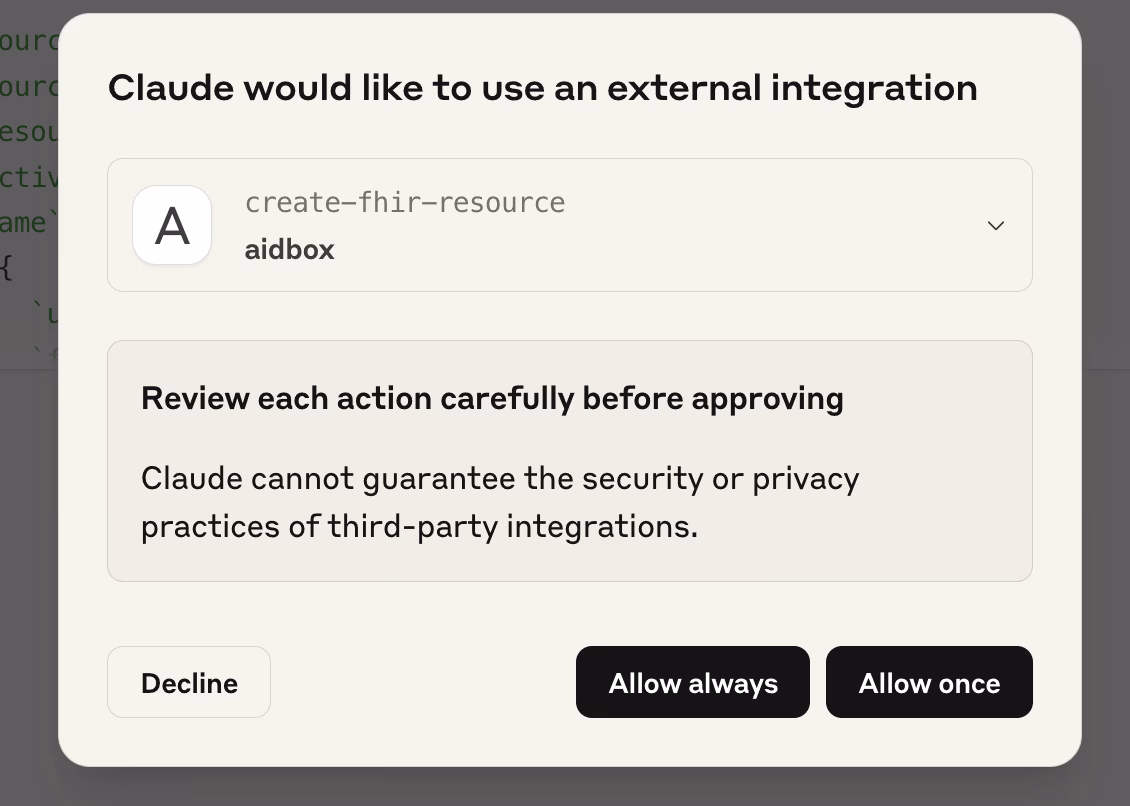
 You’ll be prompted to allow Claude to use the external tool:
 That's it! The Patient resource has been created:
 Claude used the
 create-fhir-resource tool to interact with the FHIR Server and create the Patient resource. To verify it, open the Aidbox Console UI (http://localhost:8080), navigate to the Resource Browser, and confirm that the Patient was successfully created:

Creating Related Resources
Let’s go a step further and create a couple of related resources:
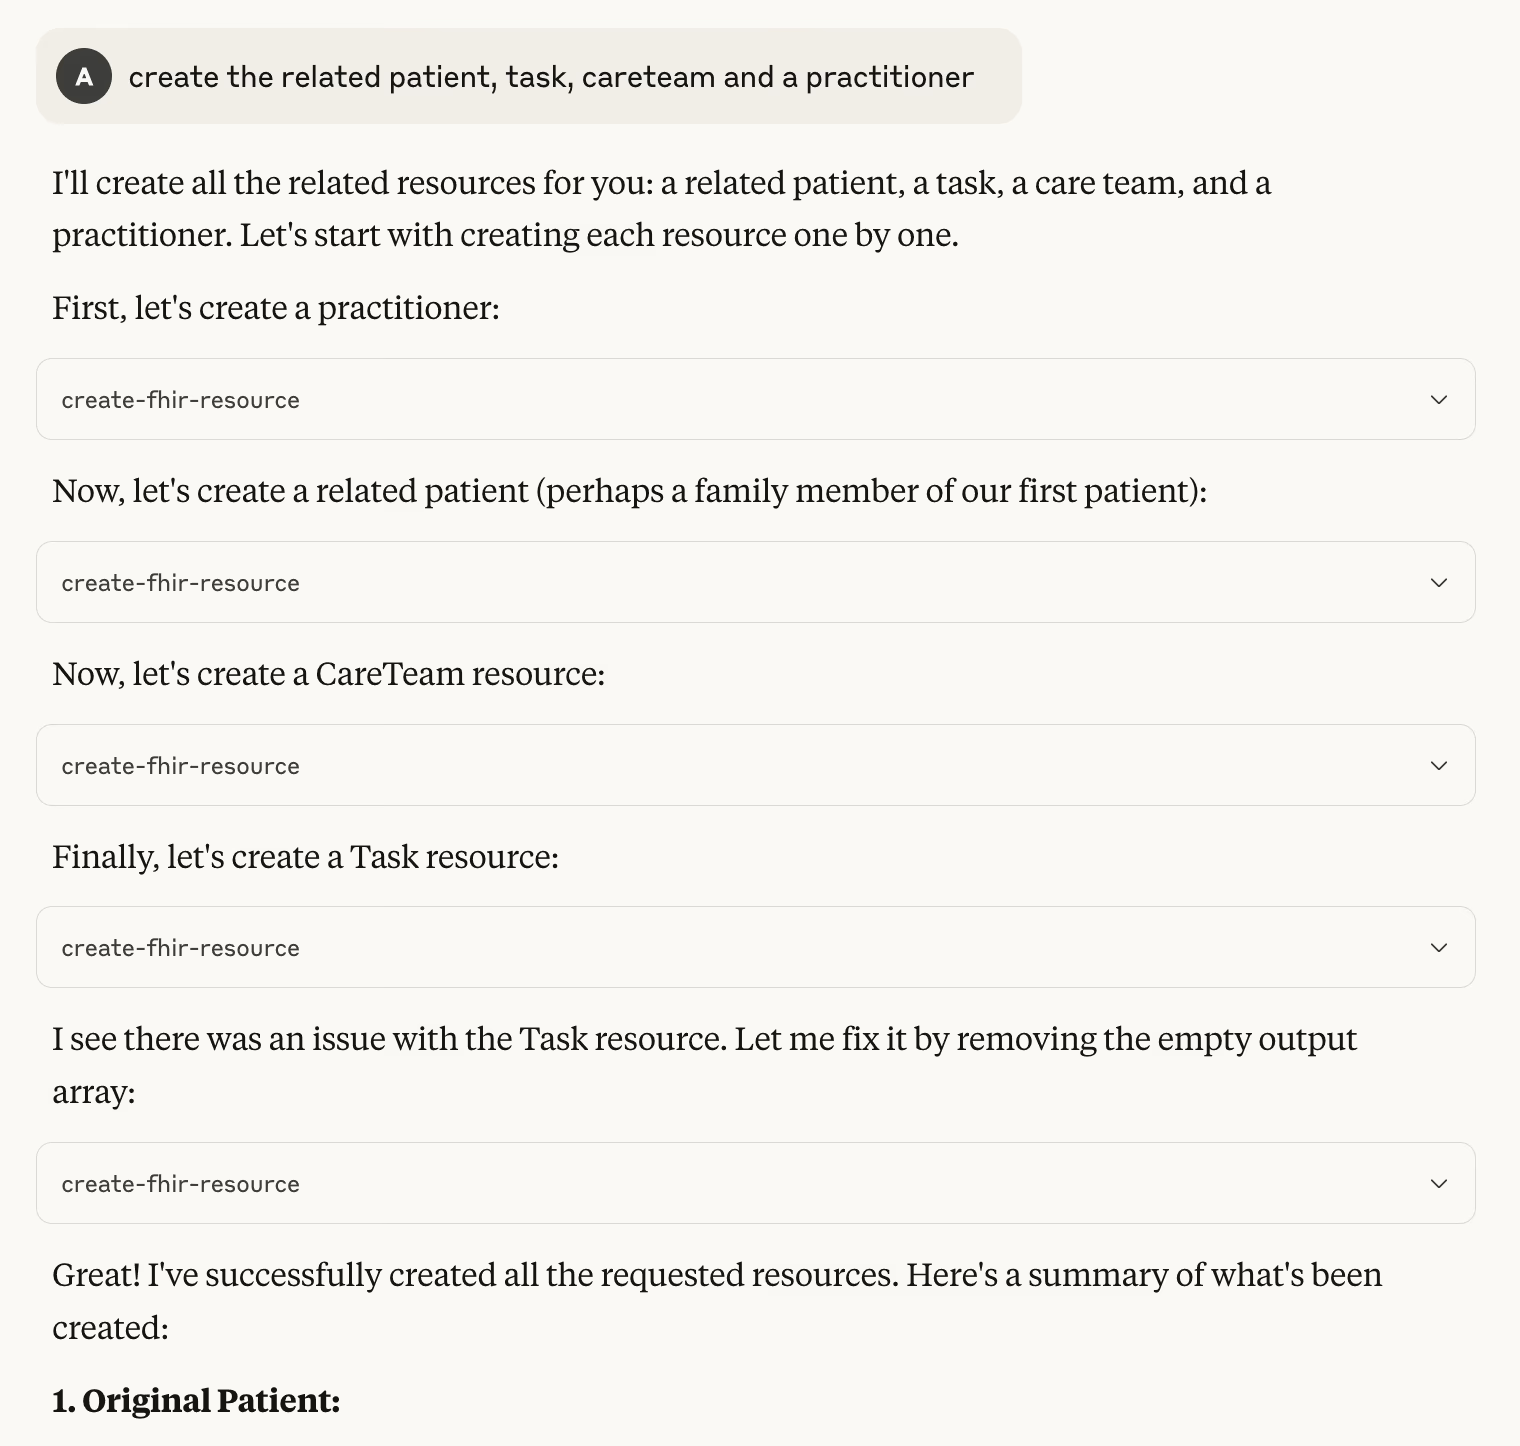 Here’s what’s interesting: while creating the Task resource, Claude received feedback from Aidbox, analyzed the root cause of any issues, and managed to fix them automatically.
Creating a Profile-Conformant Resource
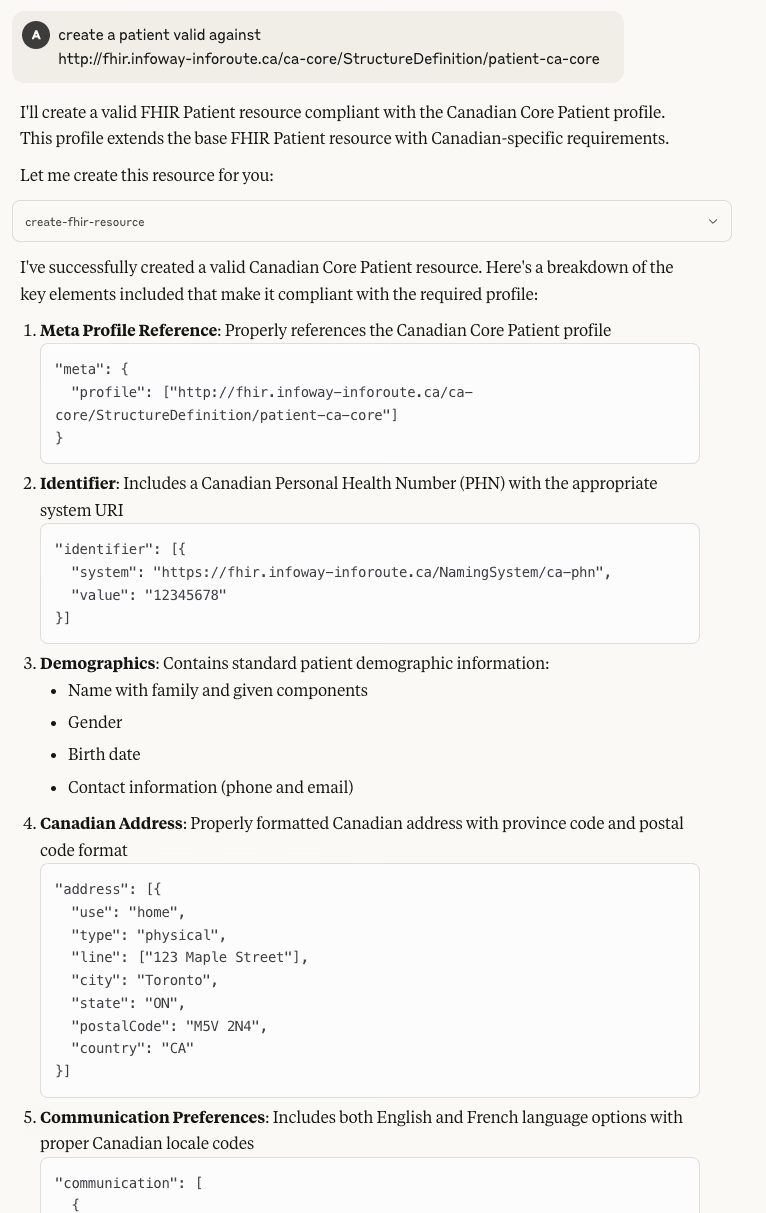
Now, let’s create a resource that conforms to a specific FHIR profile:
Try It Yourself
Now it’s your turn! Setting up a development instance of Aidbox is completely free. Try integrating your own LLM application and start exploring how AI can streamline your FHIR workflows.
See also: How We Made Aidbox UI AI-Agent Friendly with WebMCP and Agents Are Not Humans.